A gas leak is a silent, invisible danger that could be lurking within your home. Gas leaks are like ticking time bombs, waiting for a single spark to ignite a catastrophic explosion. According to the Public Interest Research Groups, gas line incidences that require reporting occur every 40 hours in the US.
Gas lines spread toxic gases that may cause asphyxiation, leading to death. Gas lines cause explosions when leaks go undetected. Every home requires gas line safety measures to prevent the loss of life and property from leaks.
Homeowner gas line maintenance is an essential skill to prevent gas line hazards. Safe gas leak repair solutions can safeguard your home from catastrophic gas incidences until experts arrive. Here is a comprehensive gas line repair guide for minor gas problems on your property.
Learning how to repair a gas line does not make you an expert. Call a professional plumber in case of emergency or extensive damage to your gas line.
Safety First: Gas Line Repair Precautions
Turning Off the Gas Supply
After suspecting a gas leak or faulty gas line, your immediate priority is to shut off the gas line. Gases can explode without warning, leading to carbon monoxide poisoning. A gas explosion can cause property damage and injuries. So, turning off the gas valve is the first step to ensure gas leak safety.
Here is a step-by-step gas shutoff procedure:
Locate the Shutoff Valve
Gas valves can be outside or inside the property. An external gas shutoff valve is near the gas meter. The external gas shutoff valve can be in a utility area such as the basement or garage. You can find the external gas shutoff valve in the mechanical room, with appliances like the water heater or furnace. Look for the valve near the first gas appliance if the valve is inside your home.
Turn Off the Gas Valve
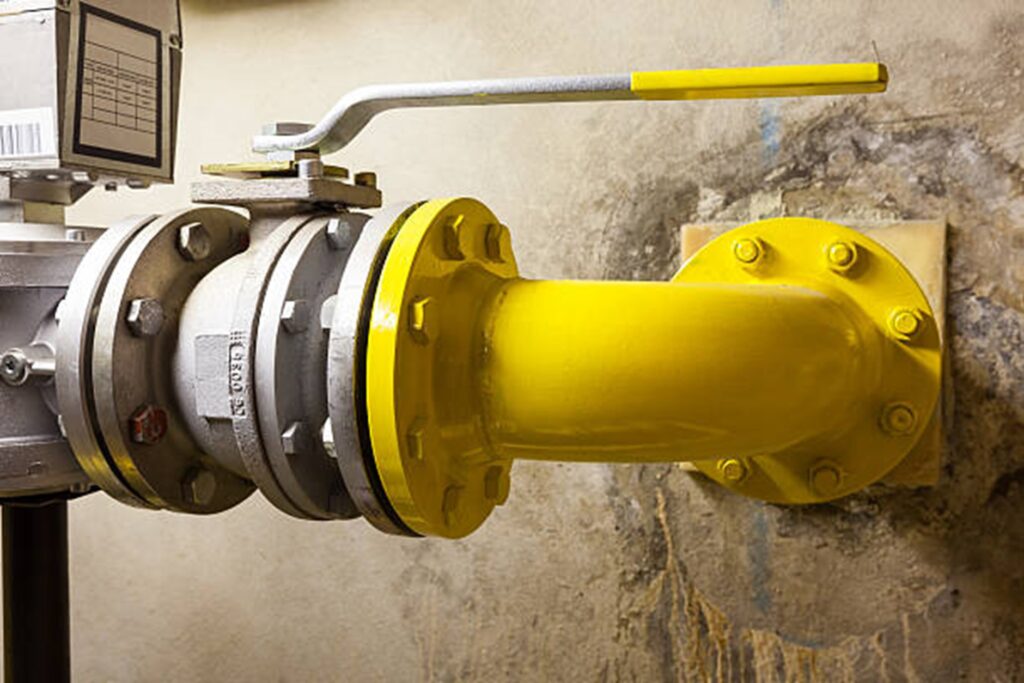
Use an adjustable wrench, clamping pliers, or an open wrench to turn the rectangular tab perpendicular to the gas line to shut off an external gas valve. A parallel flap shows the gas line is on. Internal gas valves have a ball-valve handle type. Turn off the gas valve by rotating the handle perpendicularly.
Tools & Safety Gear Needed
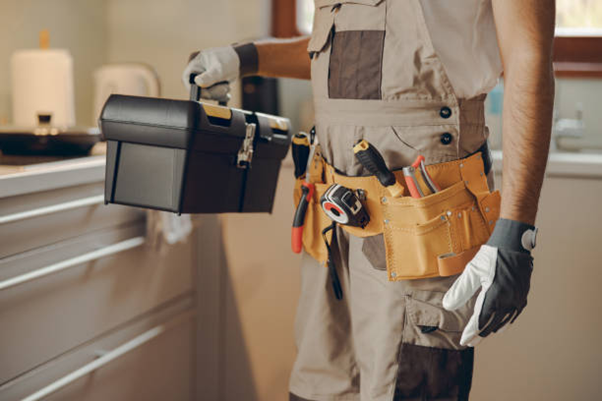
Gas is a hazardous substance. So, ensure you have protective gear before starting the repair process. Wear home gas line safety gear to prevent toxic fume inhalation, minimize injuries from flying debris, and enhance visual clarity.
Here is a list of protective gear for gas repair:
- Gas mask: keeps you from inhaling toxic fumes.
- Safety glasses: prevent eye irritation from harmful gases and smoke and cover the eye from flying debris.
- Gloves: protect your hands from cuts and bruising and enhance your grip on valves and tools, reducing on-site accidents.
- Closed-toe shoes: shield your feet from falling objects in case of an explosion.
You need professional-grade gas repair tools for safe repairs. Here is a list of DIY gas line repair equipment you will require.
- Gas leak detector: use approved detectors like the UEI Test Instruments CD100A or Klein Tools ET120 that identify odorless and trace amounts of gas leaks.
- Pipe wrench: for tightening or loosening the section of pipe needing repair.
- Adjustable wrench: for opening and closing the gas valve. You can also use an open wrench or clamping pliers.
- Gas pressure test kit: measures the gas pressure flowing through the pipe, enabling you to detect anomalies.
- Pipe cutter: for clean and clear-cut gas line portions for easy removal of the damaged parts.
- Yellow Teflon: applied on pipe threads to secure fittings connection
- Pipe dope: a chemical sealant used to secure gas pipe joints.
- Pipe fittings: connects two pipes, joints, or valves.
- Sandpaper: smoothens and polishes the cut gas pipe section.
- Acetone: removes dirt and debris on the old pipe section.
Important Safety Warning
DIY solutions have higher gas line repair dangers than professional intervention. Follow the emergency gas leak protocol when you suspect a gas line problem to reduce health hazards, physical injury, and property damage risks.
- Avoid using electrical switches, phones, or appliances that can create sparks.
- Turn off all live flames and ignition switches.
- Avoid turning any switches on or off.
- Open all windows and doors to disperse the gas.
- Disconnect any internal gas source and switch off any gas appliances.
- Send a gas leak warning to your household members and adjacent properties or apartments.
- Evacuate everyone on the property away from a safe distance.
- Avoid re-entering evacuated rooms.
- Always seek professional gas line help in case of an emergency
- Leave immediately and contact professionals if you smell gas.
Identifying Gas Line Issues
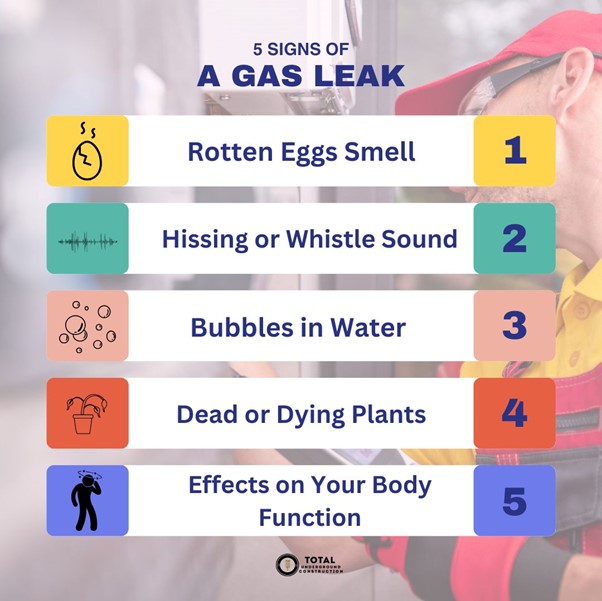
Signs of a Gas Leak
Detecting gas leaks before they escalate into disaster is crucial for any homeowner. Act fast to save lives, properties, amenities, and utility infrastructure. Although natural gas is odorless, you can detect it with a comprehensive gas leak inspection. You can also identify signs of gas line damage through visual, audible, and olfactory cues.
- Rotten Eggs Smell
Natural gas is odorless. Nevertheless, manufacturers add a harmless gas called mercaptan, its distinct sulfurous smell. The odor is a leak identifier. Your gas line is probably leaking, or gas appliances are improperly closed if you smell mercaptan.
- Hissing or Whistle Sound
Another telltale sign of a leaking gas line is a hissing or whistle sound from a fissure, nozzle, or valve on the pipe or gas appliance. Pressurized gas produces a sound as it escapes from a confined space.
- Bubbles in Water
Natural gas is slightly soluble in water. The gas produces bubbles as it escapes from the water, creating the ‘soda effect.’ The soda effect phenomenon increases when pressurized gas dissolves in water. Water bubbling like soda when next to a gas line or appliance is a natural gas leak detection.
- Dead or Dying Plants
Leaking gas reduces oxygen in the immediate surroundings. The leak interferes with plant growth, which requires oxygen for photosynthesis. Plants not adapted to low-oxygen environments will not thrive.
The high concentration of gas leaks damages plant tissues and disrupts metabolic processes. Gas leaks interfere with soil pH balance, disrupting plant nutrient intake. Nutrient deficiencies cause stunt plant growth.
- Effects on Your Body Function
Exposure to gas leaks for long periods can cause headaches, dizziness, nausea, and fatigue. Observe your symptom patterns and severity when you get home.
Repair vs. Replacement
What happens after you detect a gas leak in your gas line? The damage extent determines when to replace or repair gas lines. The rule of thumb in the gas line repair vs. replacement debacle is extreme wear requires replacements while repairs fix subtle problems. Repairing gas pipe leaks necessitates some level of expertise.
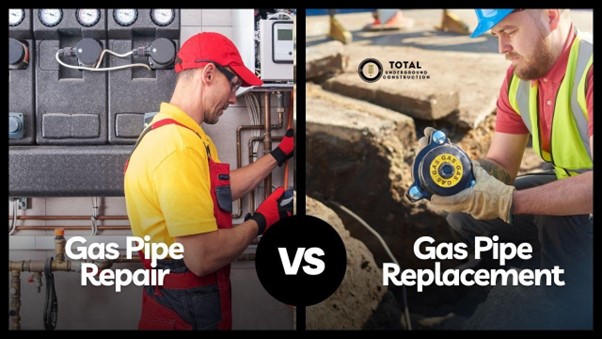
Call a full-service professional plumber if you are unsure of the appropriate service. Here are some factors that determine the best solution for your gas line.
- Age
Natural gas lines have a long life span. The gas line can serve your home for between 40 to 70 years. Most gas lines average 50 years before needing replacement. You should replace your gas line in an old property because ancient houses tend to have old utility lines run down by years of wear and tear.
- Damage Extent
You might be wondering: how do you determine the damage extent on your gas pipe? Some signs include widespread or multiple corrosion, wear and tear, or mechanically damaged sites. Repair the pipe in case of localized damage that does not compromise the pipe’s integrity.
- Costs
The cost of gas line replacement is higher than repair. Consider the cost-benefit of a DIY over hiring a professional plumber to fix the issue. You can reduce expenses by purchasing materials and tools and choosing an affordable plumber.
Step-by-Step Gas Line Repair Guide
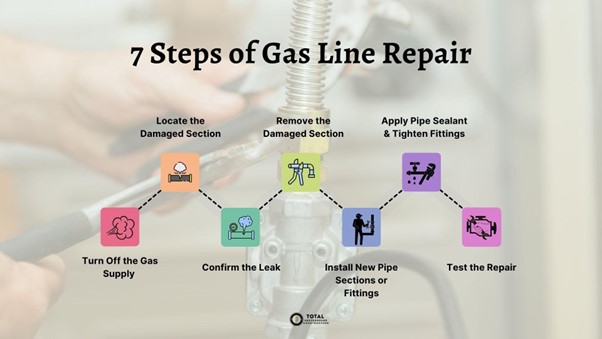
Step 1: Turn Off the Gas Supply
The first gas line repair preparation is to shut off the gas supply. Here are the gas shutoff steps you should follow to turn off the main gas valve safely.
- Ensure all your gas appliances and pilot lights are off.
- Locate your gas valve. It could be outside next to the meter box or inside the house in the basement, utility, garage, or under the staircase house.
- Use an adjustable or open wrench or clamping pliers to turn the valve perpendicular to the gas line if the shutoff valve is outside.
- Turn the ball valve perpendicular to the gas line if the shutoff valve is inside the house.
Step 2: Locate the Damaged Section
Get your gas line leak detection tools. Ensure all your windows and doors are open. Familiarize yourself with the leak detector. Leak detectors use acoustic sensors to detect gas escaping from pipes and fittings.
Leak detectors can detect even small concentrations of natural gas, propane, and other combustible gases. The gas emits a high-frequency sound as it escapes from the gas line, making it detectable by the device. The device’s alarm goes off, or the meter reading fluctuates in the presence of gas. Remember to follow the tips below in the process.
- Wear protective gear to avoid breathing toxic gases or injury in case of an unforeseen accident.
- Always start at the source to locate the gas line damage. Move the gas leak detector along the gas line.
- Move the detector along the gas line methodically.
- Focus and mark points in the line when meter readings or alarm frequency increase. These are the areas of high gas concentration.
- Isolate the areas with the highest gas concentration using a marker.
Step 3: Confirm the Leak
You can detect leaks by smelling gas fumes, hearing hissing and whistles, seeing bubbles in water, and plants dying. Detecting the gas is not enough. Confirming gas leaks follows detection. You can confirm gas leaks using two methods.
Soap Test for Gas Leaks
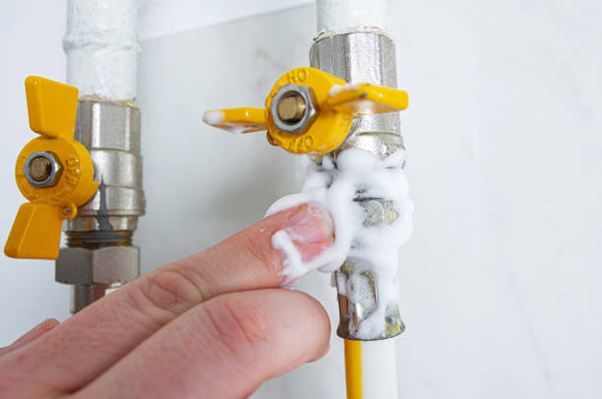
Mix a small amount of dish soap with water. Apply the soapy solution to the isolated gas leak area using a cloth. Turn on the gas supply. Bubbles will form at the point of the leak.
Gas Leak Detection Techniques
A gas leak detector alarm goes off whenever it senses the sounds from compressed gas escaping the gas line. Detectors with calibrators show sharp rises in readings when the sound levels increase, identifying the leak area.
You should also avoid the following mistakes when confirming leaks:
- Using carbon monoxide detectors: Use the appropriate detector. A carbon monoxide leak detector does not detect natural gas or propane.
- Making substandard soap solution: Enhance the efficiency of the soap solution to get noticeable bubbles by using quality dish soap and making the solution proficiently.
- Ignoring other signs: Use the visible, audible, and olfactory signs in conjunction with the gas leak detector and soap solution technique.
- Overlooking professionals: Always have an all-inclusive professional plumber on hold in case of emergencies.
Step 4: Remove the Damaged Section
Here is a step-by-step pipe removal process before fixing the gas line damage.
- Mark the area of concern: Once you have isolated the gas leak area(s), mark them for easy identification during repairs.
- Cut the affected area: Use the pipe cutter to make clean cuts to remove the damaged section of the gas line.
- Removing the Gas Pipe Sections: Use the pipe wrench to loosen sections of the gas line connected to the affected area.
- Replacing the damaged gas pipes: Cut the new pipe into the same size as the worn-out gas line pipe length and prepare to install it by cleaning both ends of the old pipe to remove debris and gunk.
Step 5: Install New Pipe Sections or Fittings
Start the gas line pipe installation by cleaning the old pipe using acetone to remove dirt and impurities. Use sandpaper to scuff the pipe and even the cut area. Take the new gas line section and fit it loosely on the old line. Ensure the section fits.
Use gas pipe fittings to connect the old pipe and the new pipe. Ensure to choose the appropriate gas line repair material for the installation. The replaced pipe section should be the same as the original pipe. Ensure compatibility with the existing pipe in function, temperature tolerance, and pressure handling capacity if using a different repair pipe material.
Step 6: Apply Pipe Sealant & Tighten Fittings
Applying pipe sealant on pipe fittings is essential to secure the gas pipe firmly. Apply sealants on threaded pipe joints to strengthen its hold on the fittings. Plumbers use pipe dope when tightening gas line connections because it seals and lubricates the connection, making it easy to unthread.
Pipe dope is a thick paste. Apply it using an applicator brush on the fittings’ threads. Connect the pipe sections and allow the sealant to cure. Avoid over-tightening fittings, as the pressure can burst or crack the gas line.
You can use yellow Teflon tape instead of pipe dope. The yellow Teflon tape is another effective gas pipe fitting sealant that works well alone or with pipe dope. Wrap the tape around the pipe threads before attaching it to the gas line. Nevertheless, pipe dope is more effective because it provides a thicker and more reliable seal.
Step 7: Test the Repair
Gas leak testing after repair is crucial to ascertain the efficiency of your gas line and prevent hazards. Ensuring gas line safety should always be a top priority from the start of the repair to its completion. Turn the shutoff gas valve on by turning it in parallel to the gas line.
Loo out for sounds and smells on the new connections. You can also use the soapy water confirmation test or a gas leak detector along the gas line when testing gas line repairs. Your work is complete if there is no leaking gas from your assessments.
Here are tips on what to do in case the repair does not hold.
- Close the shutoff valve and secure all the joints.
- Consider changing the new pipe to a compatible material with the old pipe and fittings. Ensure the new pipe material is code-compliant.
- Check for signs of over-tightening the pipe fittings.
- Call a professional plumber for quality and comprehensive repairs.
Common Mistakes to Avoid in Gas Line Repairs
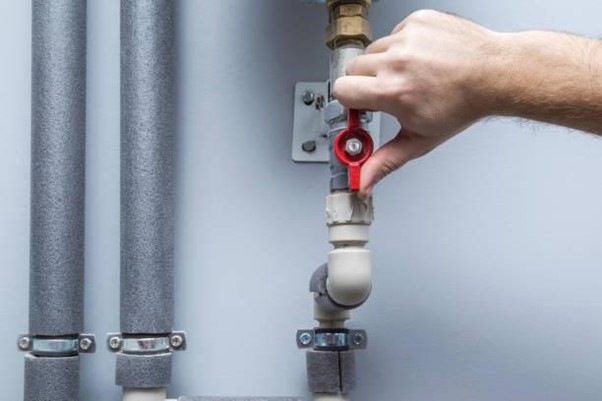
- Over-Tightening Fittings
Over-tightening is one of the most common gas repair mistakes. Avoid over-tightening gas fittings. It strips the threads, creating gaps that can cause leakages. Over-tightening can deform or crash the gas pipe and fittings from the resulting pressure.
Here is how you can avoid over-tightening the gas fittings. Tighten the pipe fittings using a wrench or fingers. Make an extra 1/4 turn to secure it once the connection holds.
- Incorrect Use of Sealants
Avoid gas pipe sealant mistakes. A wrong sealant will not secure the pipe fitting and new installation, creating gaps for gas leakage. Compatibility issues lead to leaks due to insufficient sealing on the ring. The wrong sealant can react with the gas pipe and fitting, compromising the gas line structure.
Choosing the right pipe sealant is essential for the efficiency of the gas line repair. Here is a guide on selecting the correct sealant.
- Choose an approved sealant with a suitable maximum working pressure and temperature.
- Pipe dopes are excellent for sealing residential gas line connections because they work as lubricants and sealants.
- Avoid epoxy sealants due to pressure and temperature intolerance and inflexibility.
- Use the yellow Teflon thread sealant for gas lines. White Teflon sealant is for water lines. Choose the 1/2-inch width tape for smaller-diameter pipes and 3/4 or 1-inch width tape for large-diameter gas pipes.
When to Call a Professional
A small-scale damage can be a DIY gas repair project. A localized leak, rust, or damage is easy to fix with tried and tested step-by-step guidance. However, extensive damages like sudden bursts, multiple corroded areas, or wear and tear on fittings and pipes require professional gas line services. Knowing when to hire a gas repair professional is crucial.
Total Underground Construction offers comprehensive gas repair services for complex gas line issues. Our service package also includes emergency gas line repair. Call us today for reliable, affordable, and quality services.
FAQs Related To Gas Leak
Common gas leak signs include a rotten egg smell from the harmless sulfurous compound added to natural gas. You may hear a hissing or whistling sound as the gas leaks through a small crack in the gas pipe. Water adjacent to the pipe will produce bubbles like a soda as dissolved gas escapes. Plants near the leak will weaken or die due to limited oxygen supply and soil gas poisoning.
DIY repair requires a gas leak detector to detect and confirm the compromised area(s). You need a pipe cutter to remove the damaged pipe portion and adjust the new pipe’s size. An open or adjustable wrench or clamping pliers tightens and loosens pipe connections. Also, get sandpaper to clean the old pipe section and polish the cut areas. Pipe fittings connect the new and old pipes. Acetone removes dirt and debris. Yellow Teflon or dope pipe secures fittings. A gas pressure test kit measures gas flowing through the pipe after repair.
A professional plumber typically charges between $85 and $175 for a gas line repair. The price is higher for a DIY project because you must buy all the repair tools and materials, including gas and pressure testing equipment.
Sealants provide a long-lasting and secure hold between gas line connections. Plumbing codes have specific sealants for gas lines. The sealants can withstand high pressure and temperature and accommodate pipe movements. The pipe dope is the best for sealing and lubricating gas line connections and joints. The yellow Teflon tape is the specific thread sealant for gas pipes.
Locate the shutoff gas line valve inside or outside your home. Check next to the gas meter if the valve is outside. Check in the basement, utility room, garage, or under the staircase if the valve is inside the house. Turn the valve perpendicular to the gas line to shut it off. Use an open or adjustable wrench or clamping pliers to turn it if you cannot move the flab with your hand.
Consult a professional plumber if you are unsure about repairing your gas line. A certified plumber should handle extensive or complicated damages on the gas line. Call a plumber if your DIY repair does not solve the gas leak.
You can repair minor, localized damage to a gas line that does not compromise the pipe’s structural integrity. However, extensive damage that recurs on the pipe’s wall requires replacement.

